Tapestry weaving is a beautiful simple craft with these instructions you will be able to make a cardboard loom and grasp the foundations of tapestry weaving together- happy weaving!
Ideally read this blog in conjunction with my Beginners Guide to Tapestry- which is a free download available to all email subscribers.

An example of a tapestry you can make with one of my children’s tapestry kits
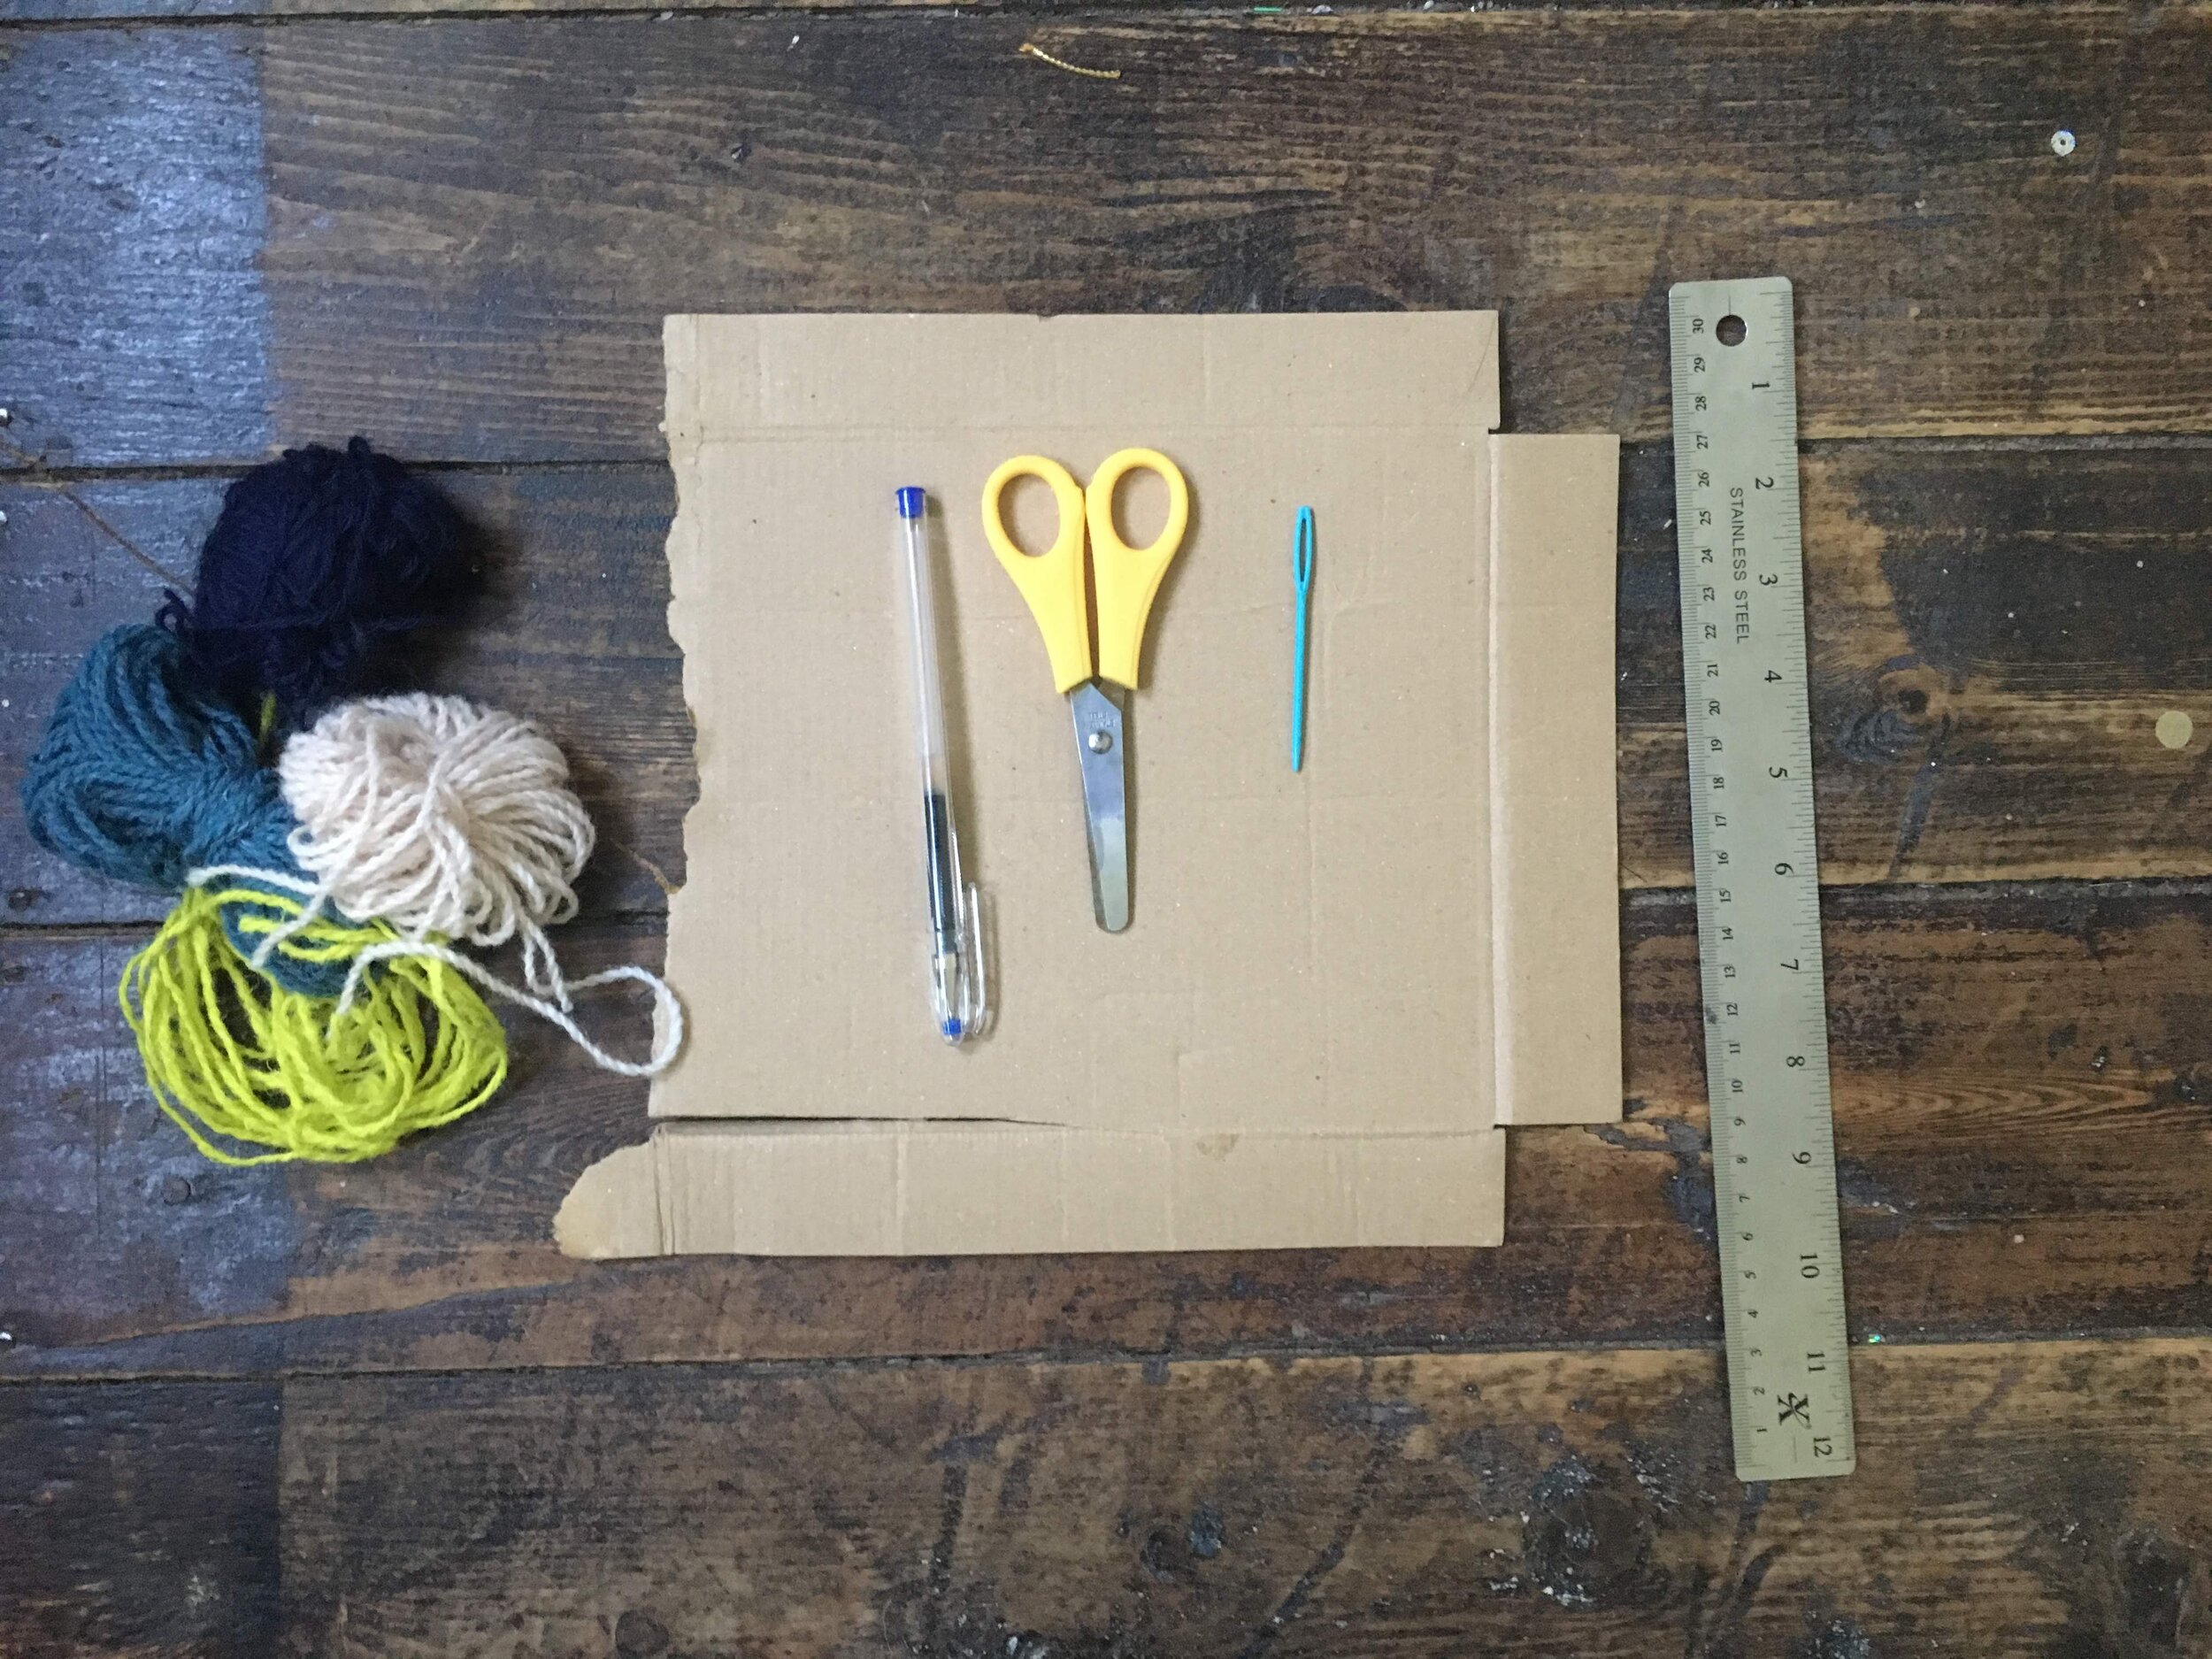
You will need; a piece of A5 cardboard, ruler, scissors, craft needle, pen and a selection of yarns. I like using woollen Axminster yarns as it creates a sturdy robust weave but you can use what ever you have around…even paper or branches!

Mark along the bottom of your cardboard every 1/4 inch or every 1/2 inch depending no the dexterity ability of the child weaving. Leave 1inch either side of the frame free.
If they are patient and happy working more detailed make the gaps shorter if they prefer to work quicker use wider spacing and thicker yarns!

Cut a 2cm snip into each spacing marker like so.
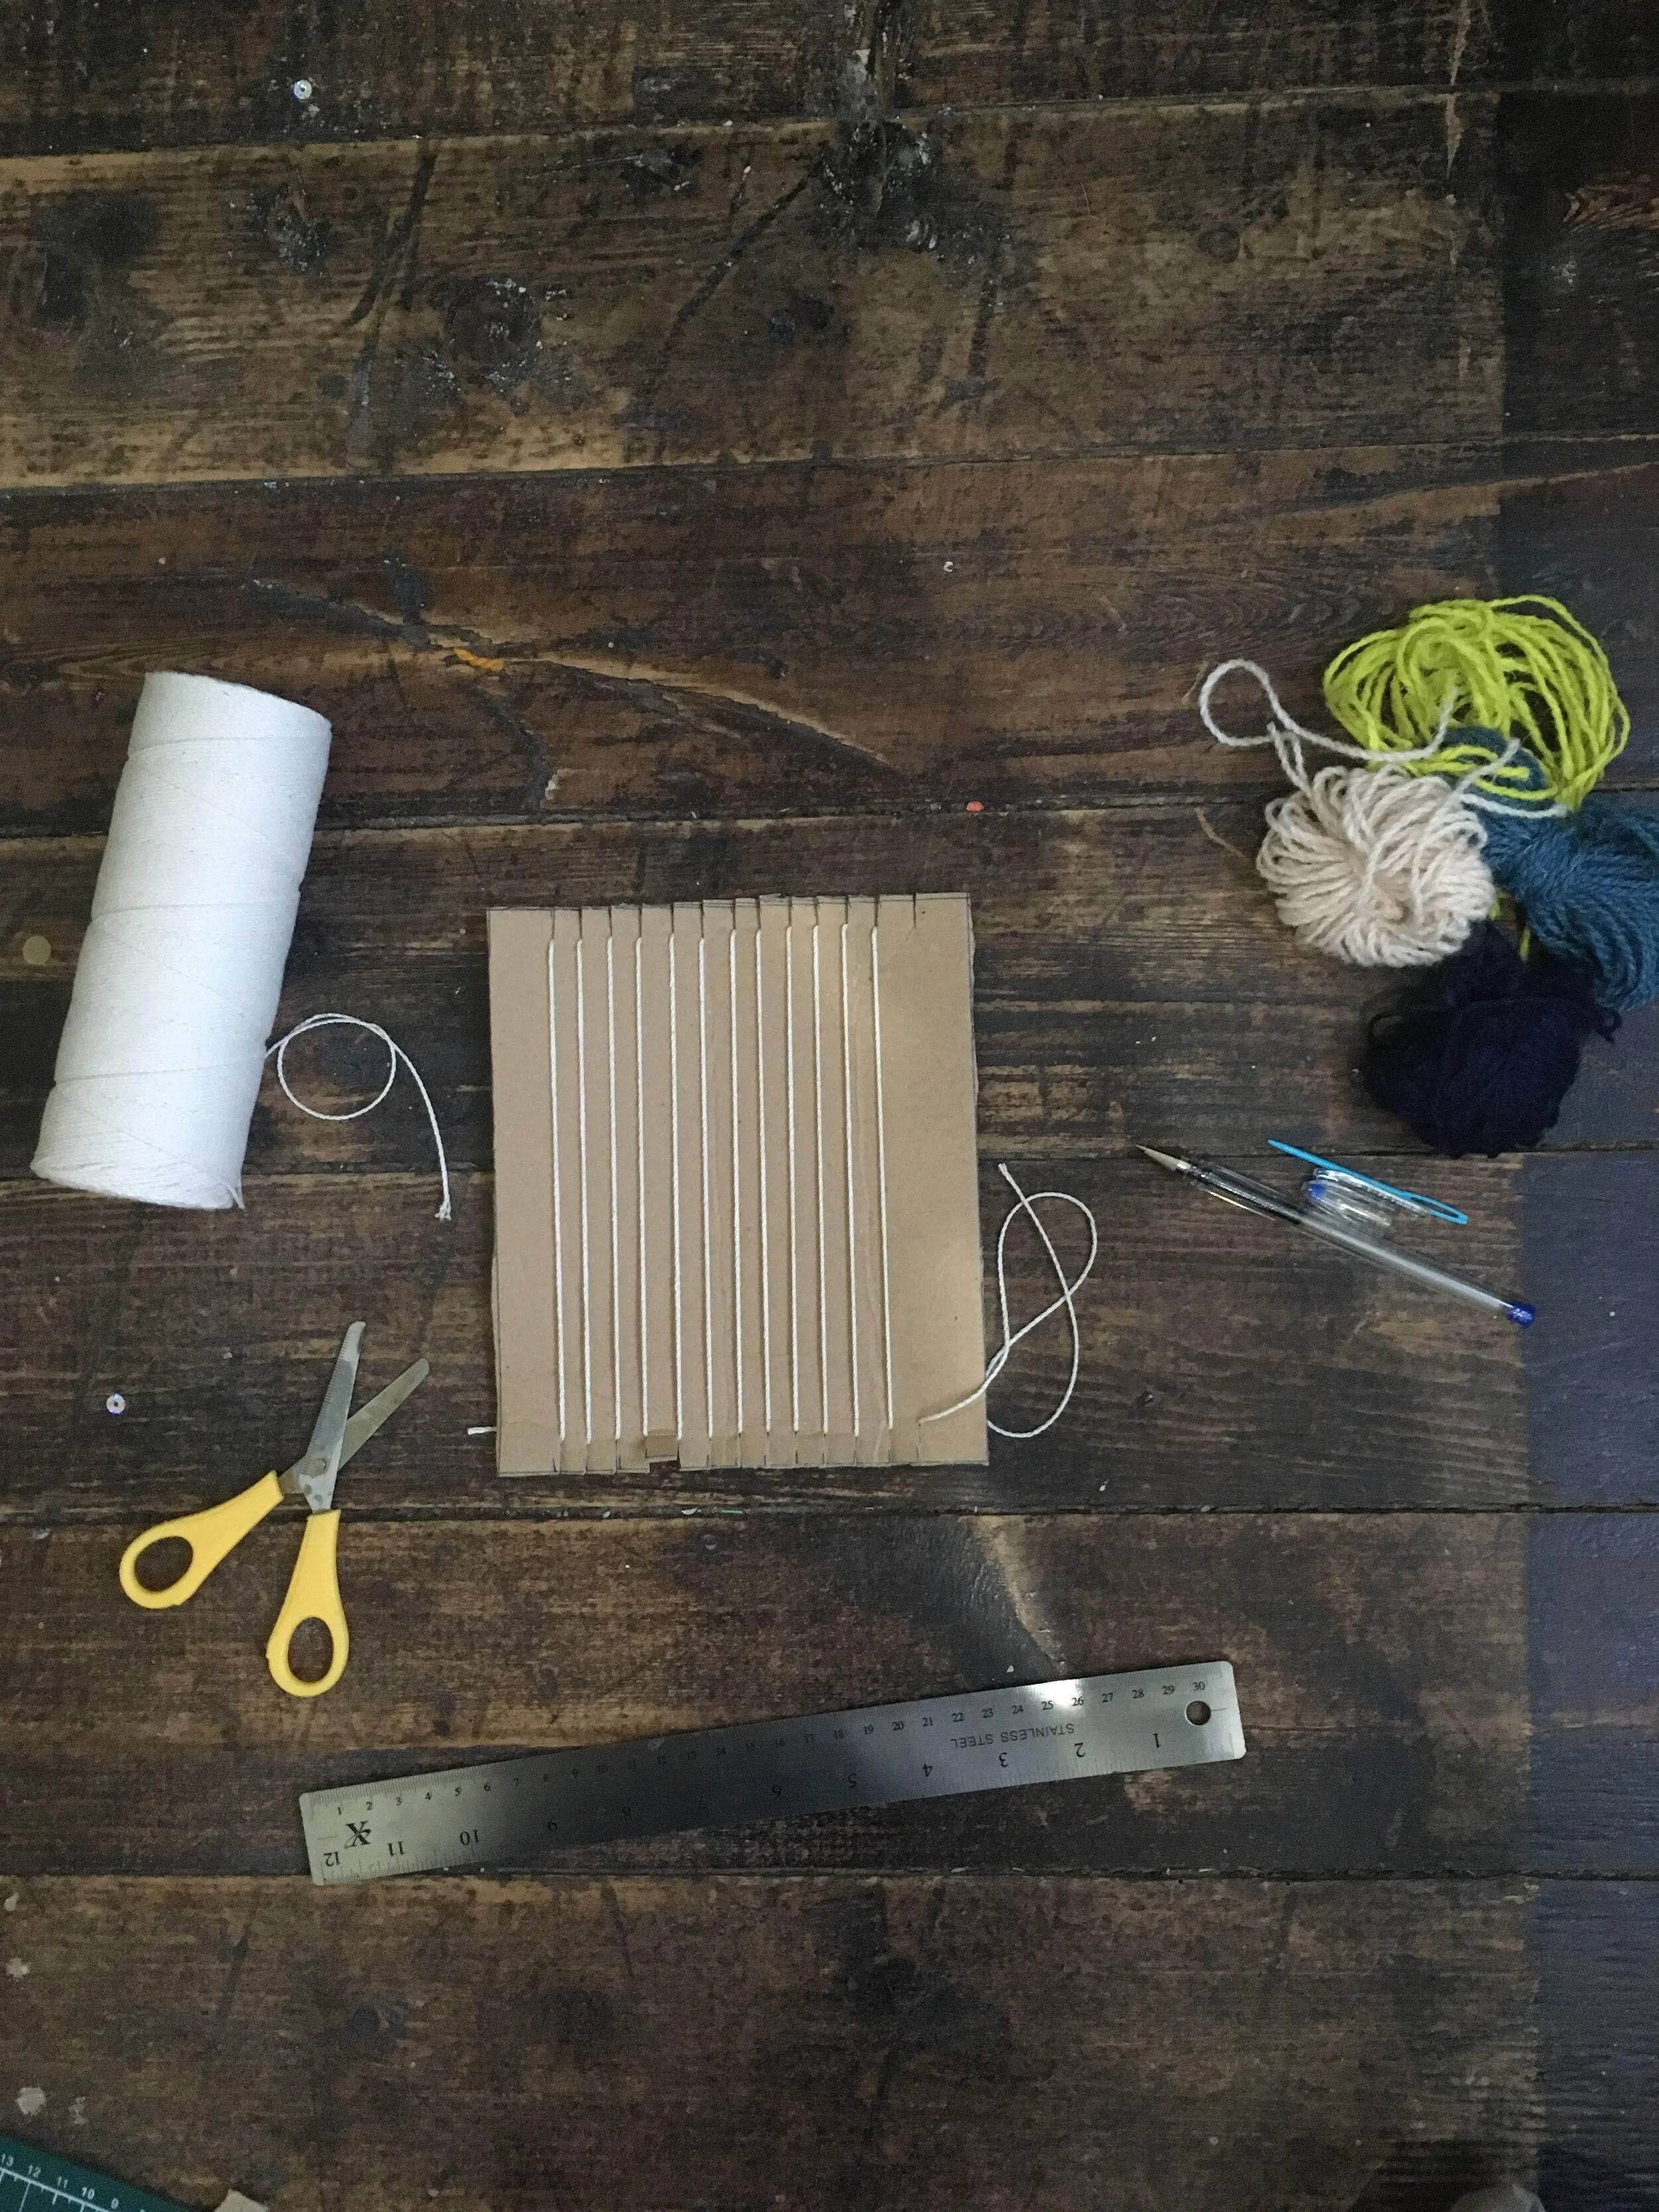
if you have it using a cotton yarn/twine wrap the yarn around the cardboard frame firmly securing it into every cut groove. Secure at the back of the frame either with a double knot or a piece of sticky tape. Congratulations you have successfully warped your first tapestry warp!

Start weaving! Cut a piece of yarn about 40cm long.
If your using one my Children’s tapestry kit use 2 strands of yarn and tie them to the first piece of warp with a single knot. Position the knot at the back of the frame and then thread the needle with the other end and take your needle over/under/over/under until you reach the end of the warp strands.
This yarn travelling across the warp strands is called your ‘weft’.
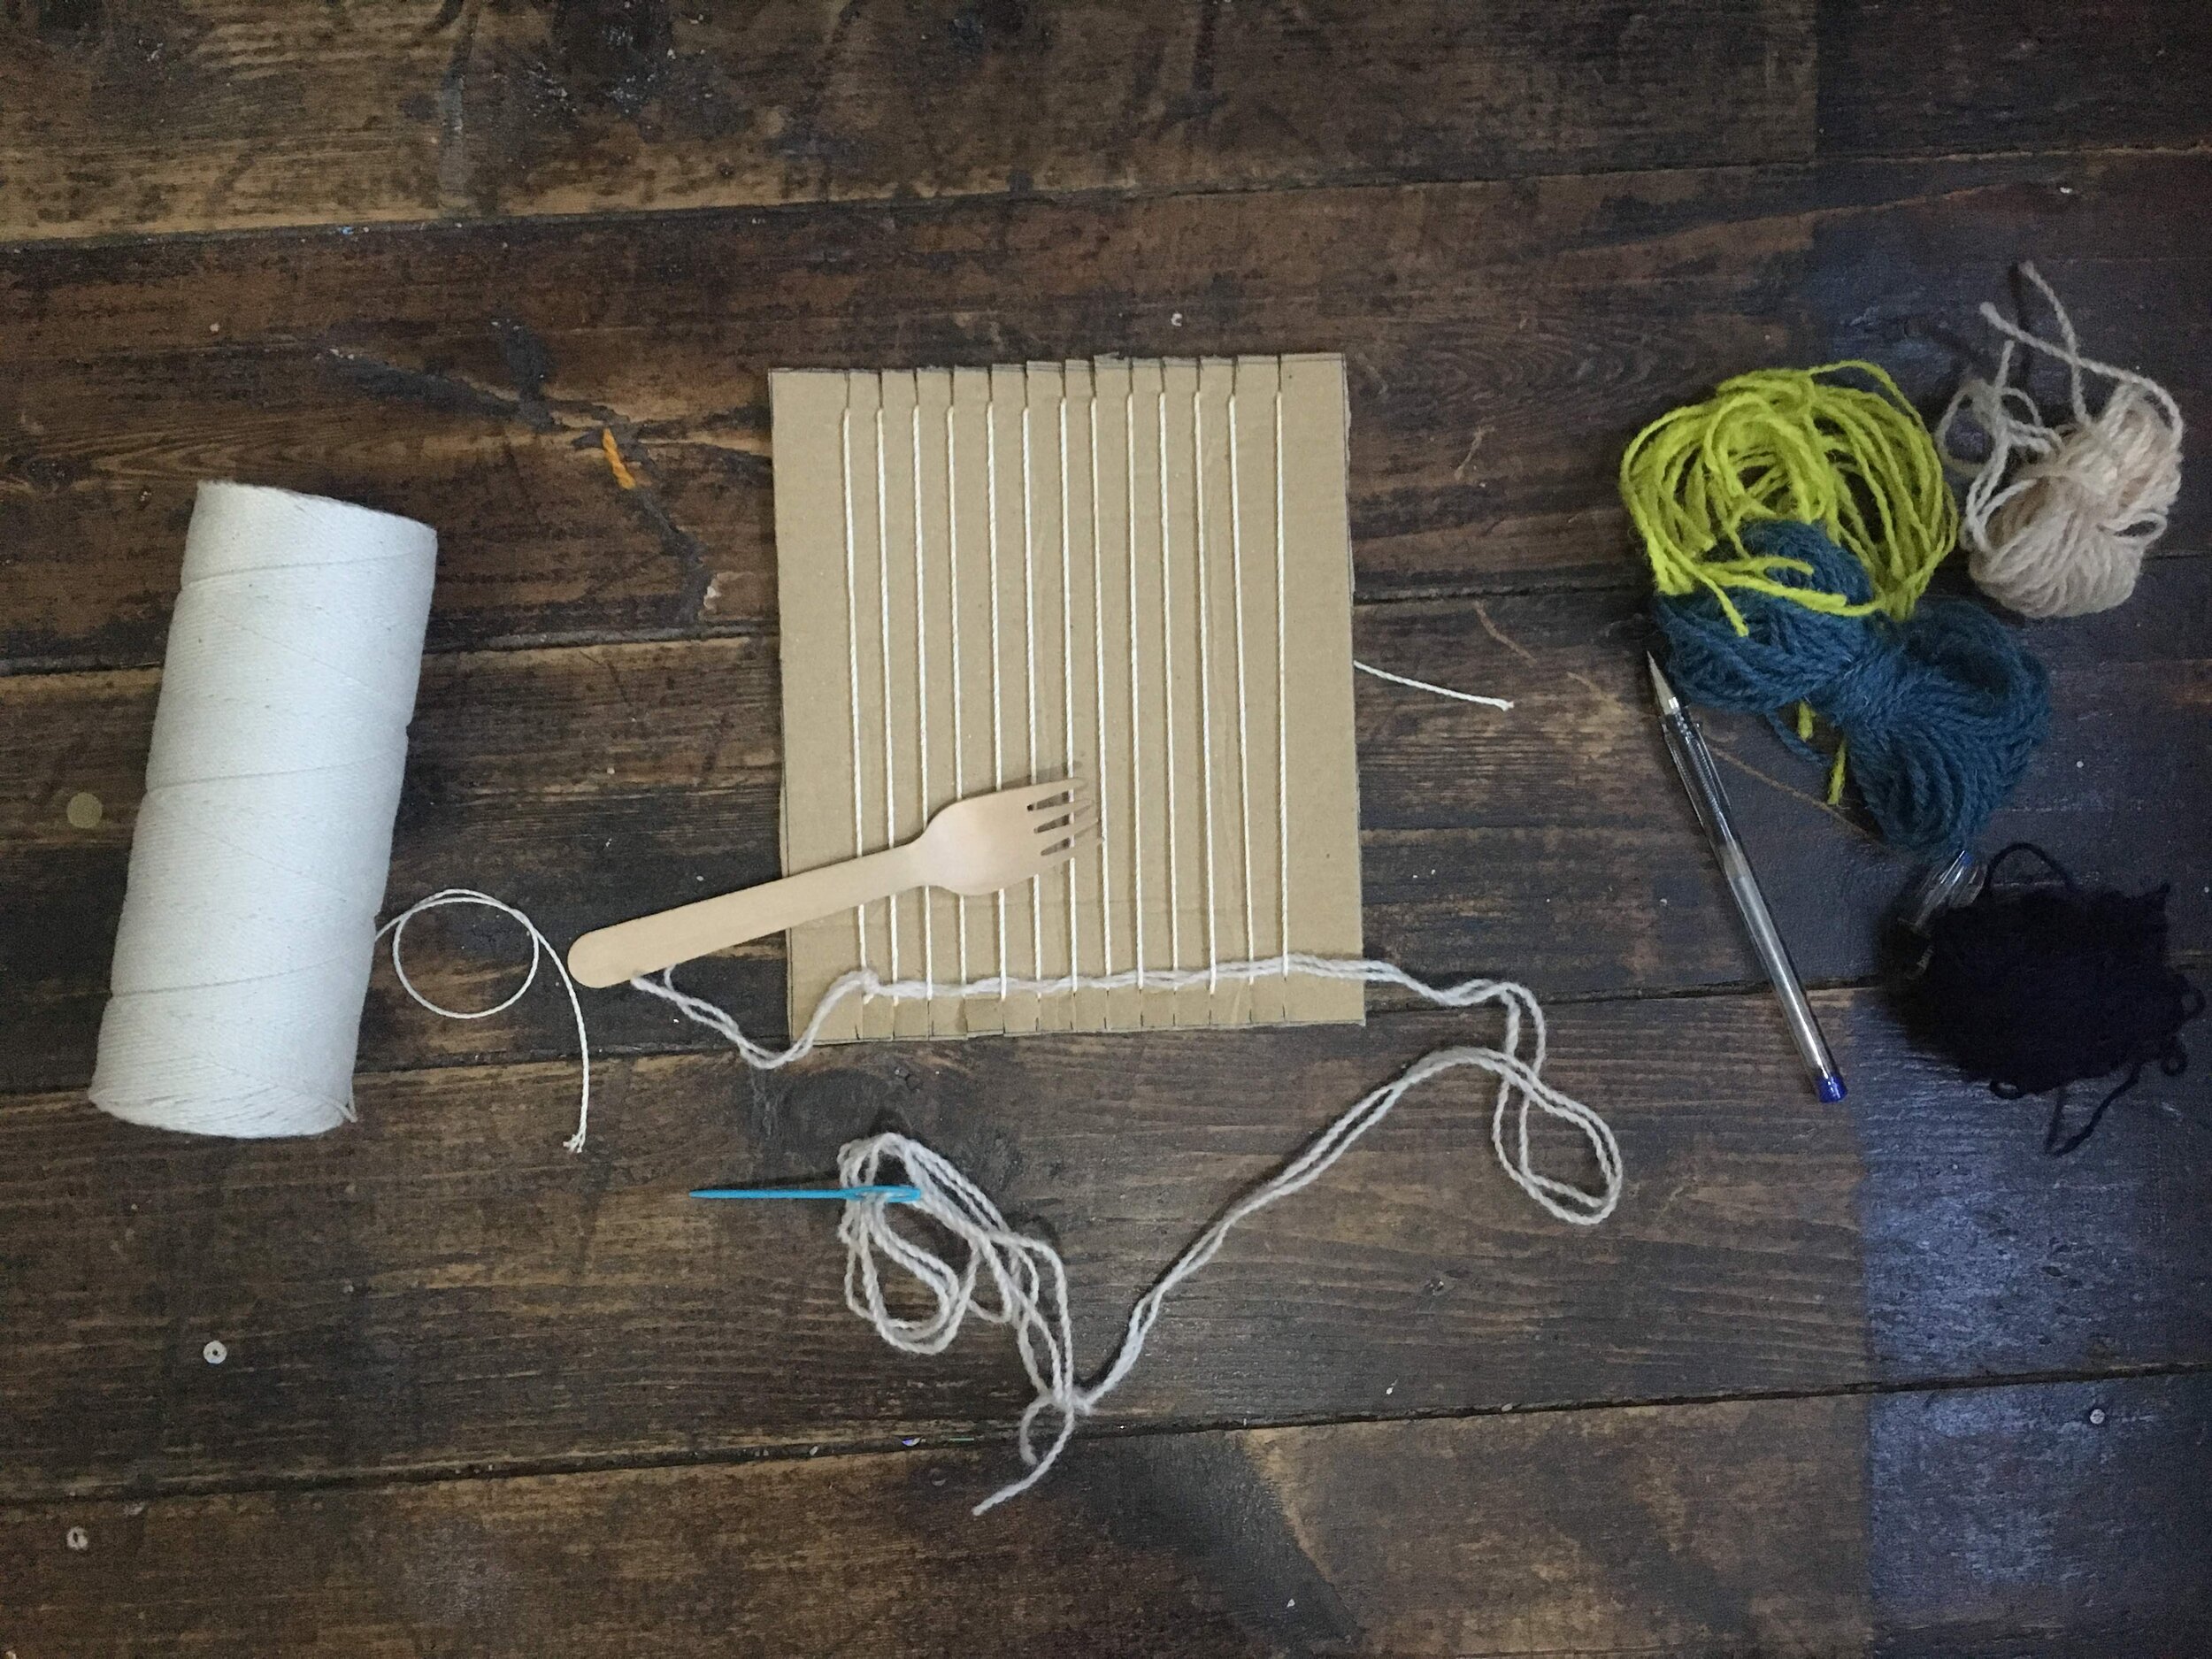
Use a fork to act like a comb gently pushing the weft down. Try and keep the weft loose’ish’ so it doesn’t pull the sides of the warp in. Refer to page 16 of my beginners guide for my explanation. You can download my guide for free if you join my mailing list.
Once you have completed your first row of weaving thread the weft back going under/over/under/over the ALTERNATE warps to the previous row and so forth for each new row of weft weaving.

Once your child has done a few rows of weaving this will stabilise the warp and you can add fringing- by using the Rya knot technique on page 17 of the beginners tapestry guide. Wrap the yarn around your hand a couple of times and the then cut in half so that you end up lots of yarn strands around 7cm long.
Take a few of these strand 3-4 and put the middle of this bundle of yarns strands across the first two warps strands and then pull the ends of the yarn strand from behind. Gently pull this knot down to the base of your frame. Continue this process across your whole row of warps.
Don’t worry if you have 3 strands left create a Rya knot around 3 warp strands just like you did with 2 warp strands.
If you child is very young its probably best just to do plain weaving and not worry about fringing!
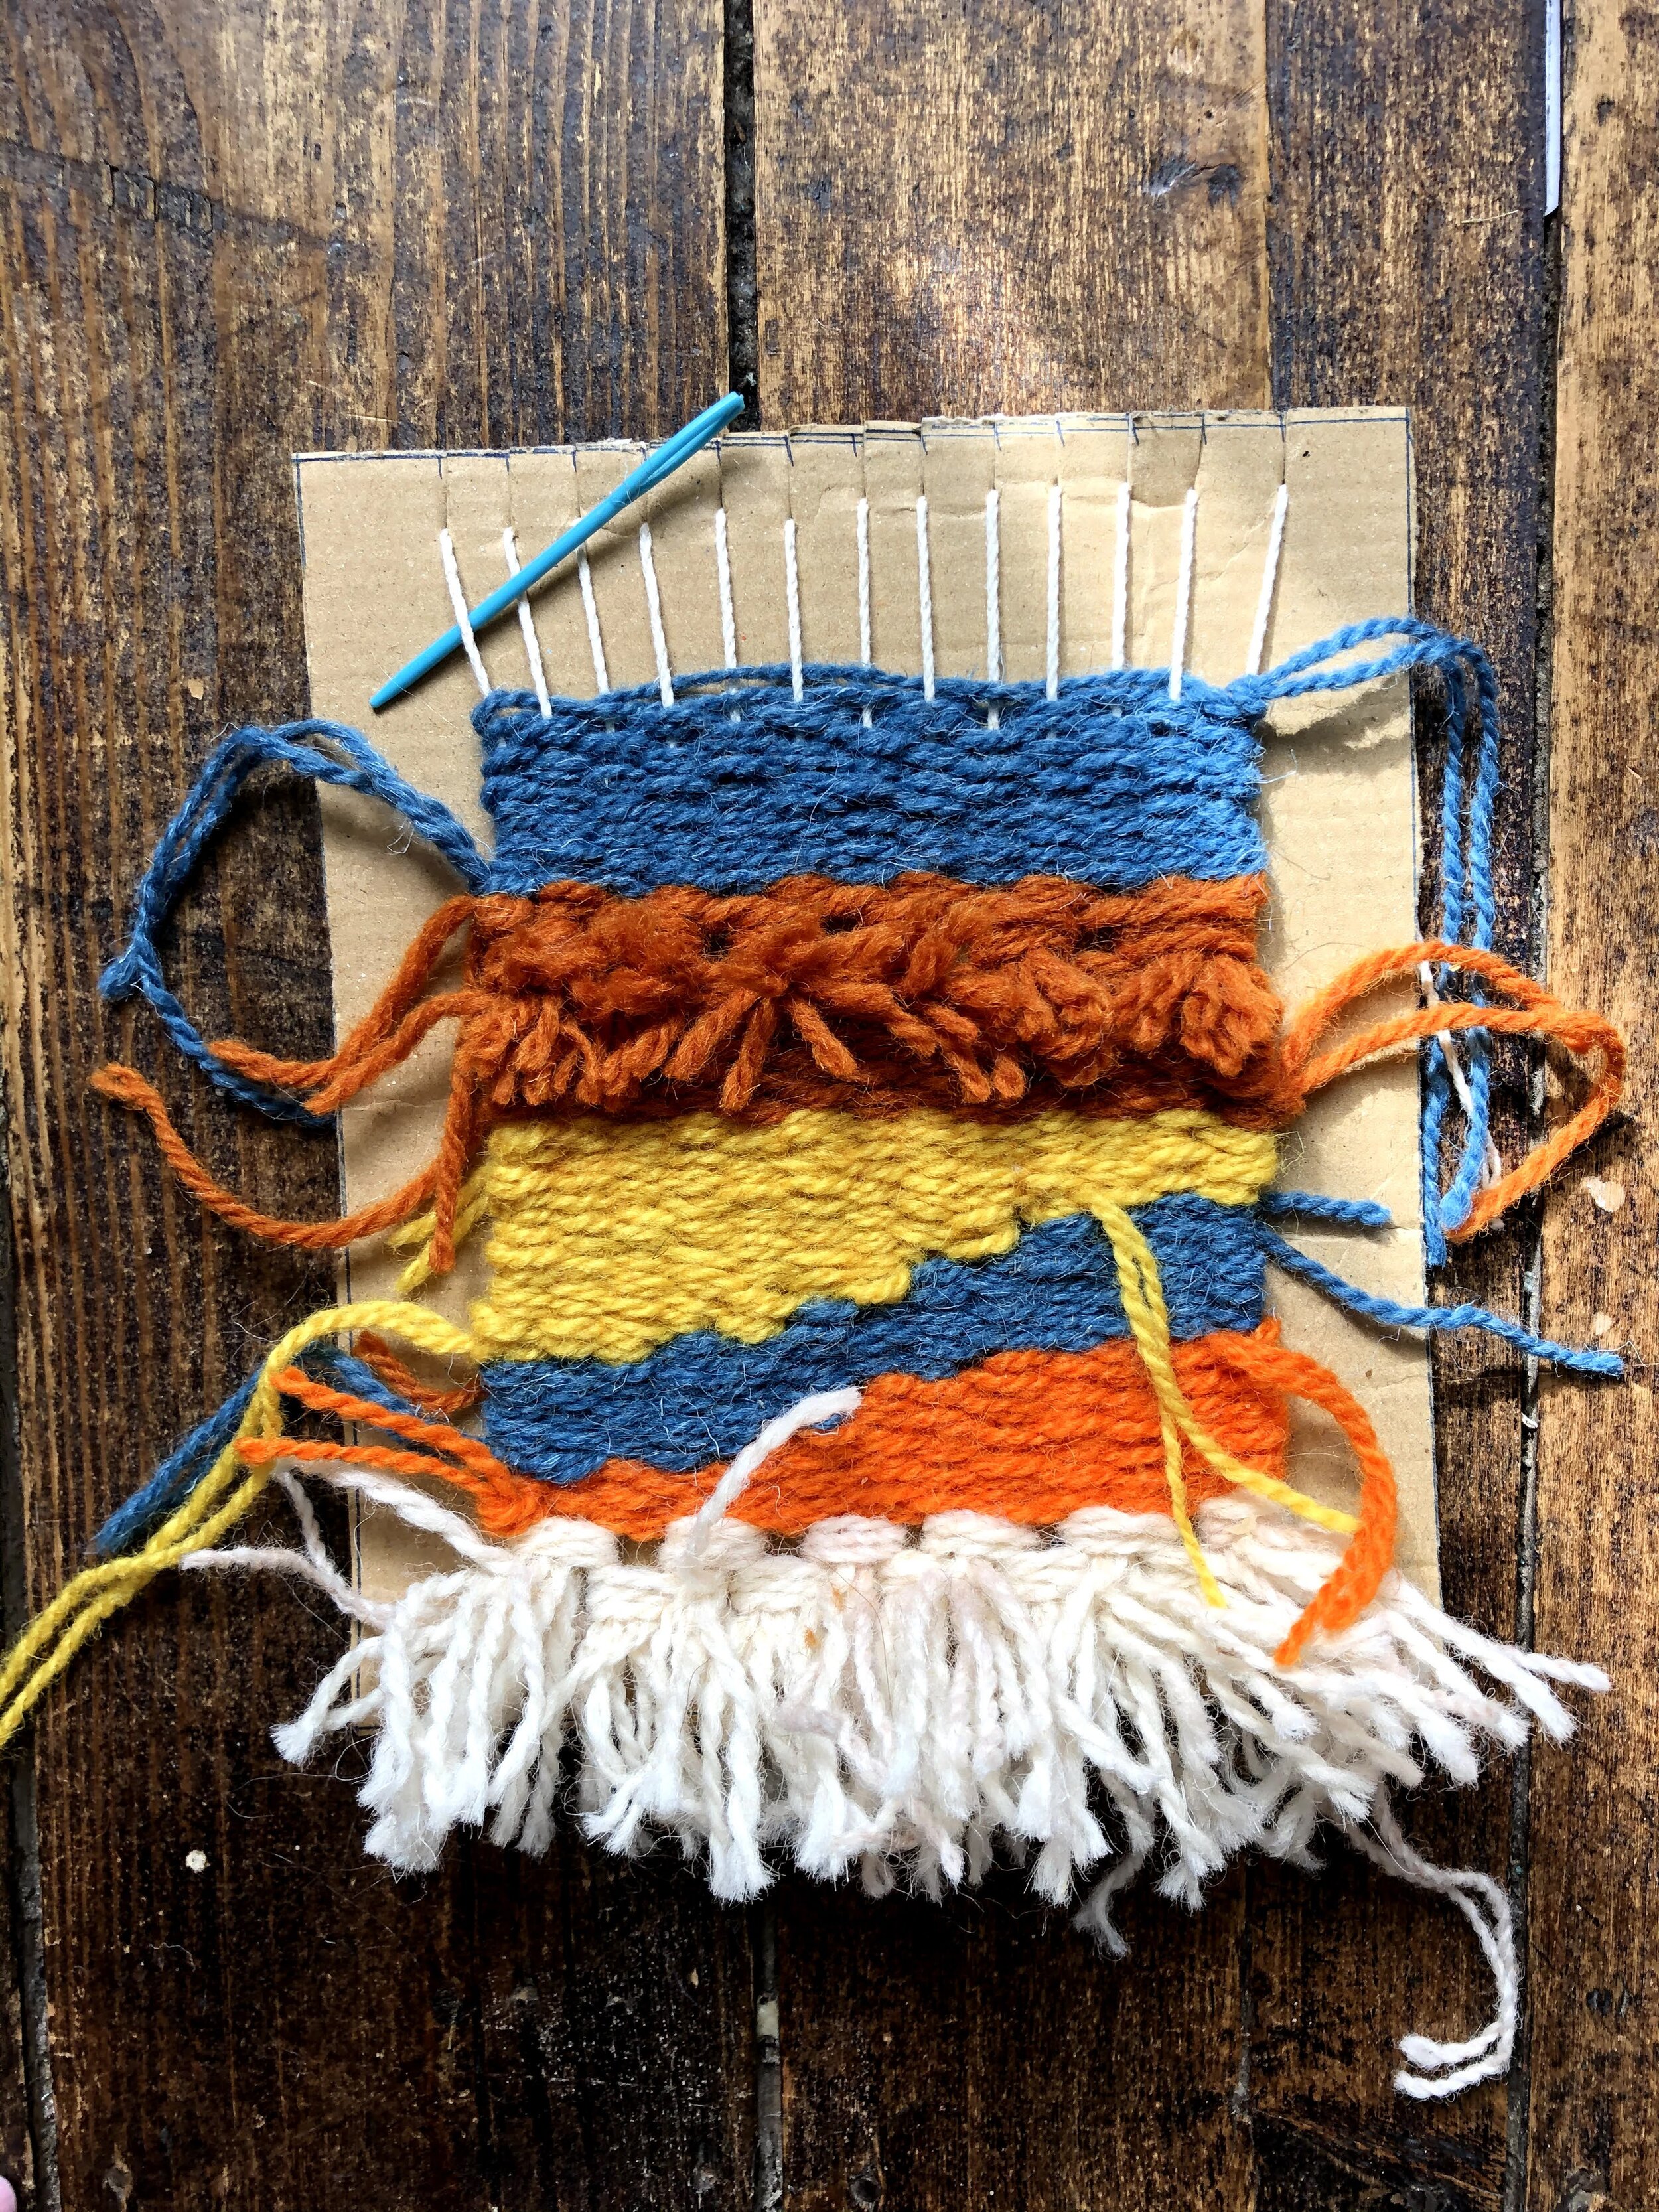
You can add lots of colours by doing a stripe design, this is definitely the simplest and easiest weave style for a young child.
Once the weaving is complete cut the warps across the middle of the back. This will mean you have a long piece of cotton warping thread remaining. Tie all the bottom warps strands in single knots as close as you can to the weave.
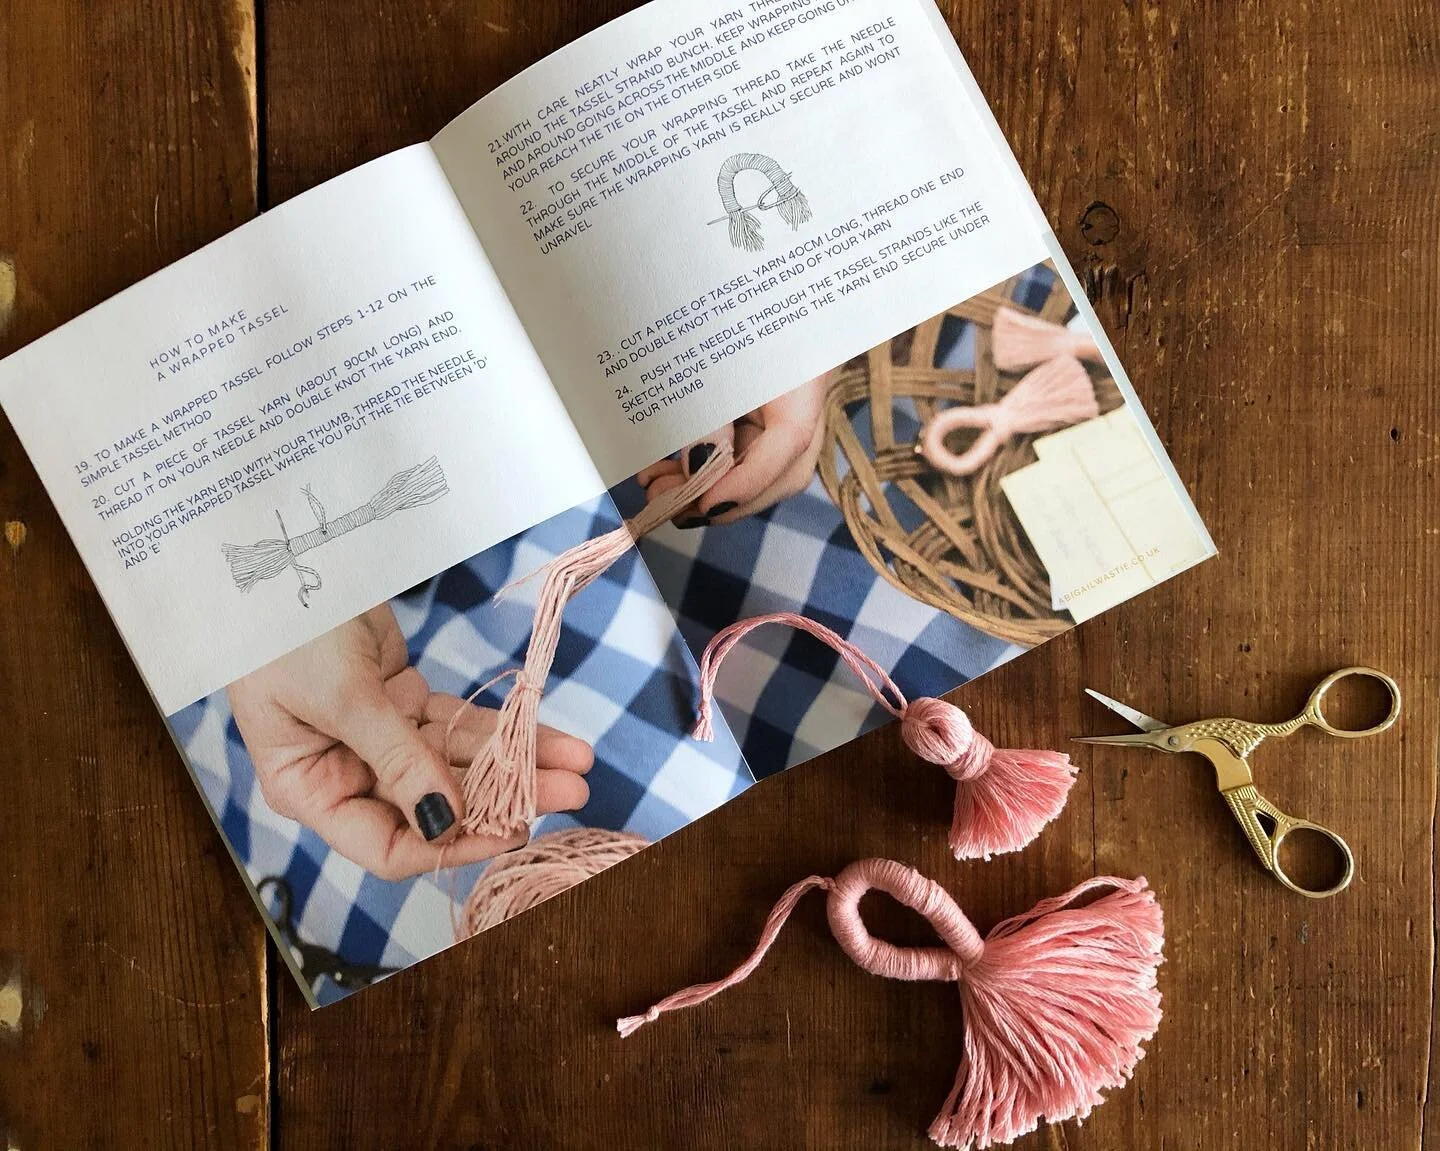
The top warp threads can either be single knotted too or you can put your doweling or stick along the top of the weave and then knot these warp thread around the stick, tying the knot at the back of the frame.
You will have lots of yarn ends on the frame like this picture- you can either sew the thread ends into the back of the tapestry or cut them short.

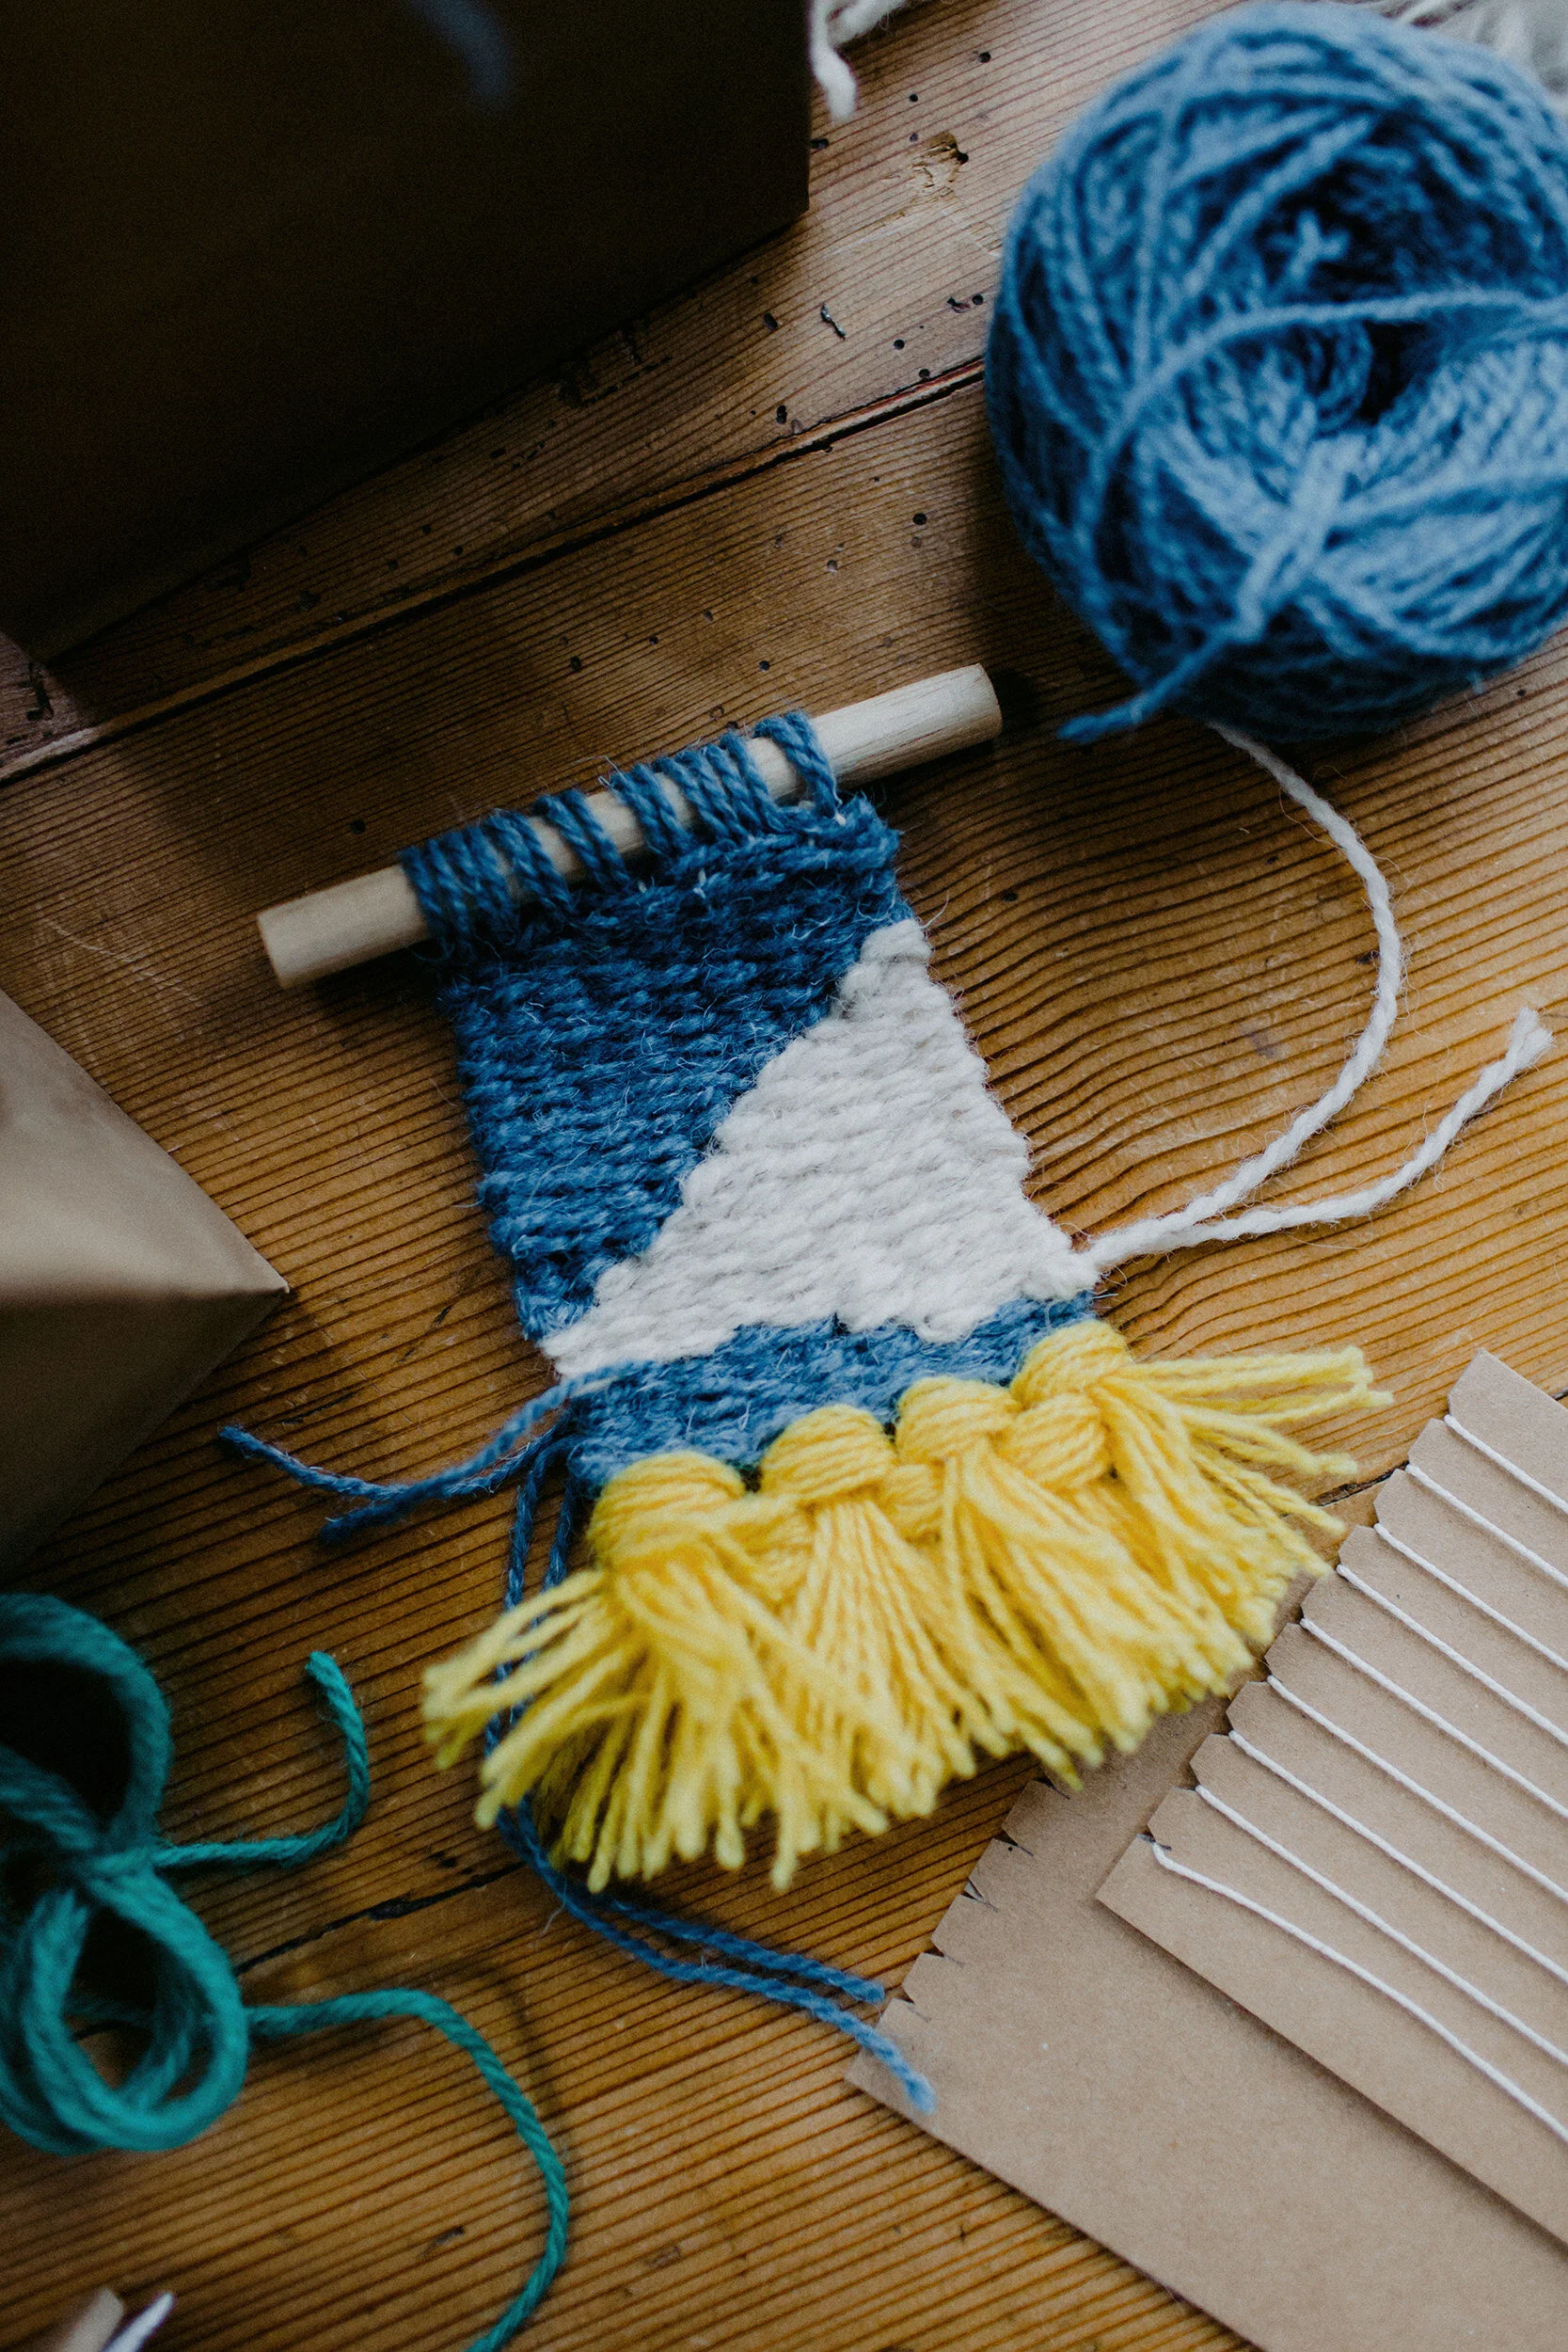
For this weave I drew a simple circle on the warp strands and wove the circle a contrasting colour. I added a short fringing to the top and then I knotted the top and bottom warp strands. Then using some of the weft yarn I threaded a long piece of yarn securely to the back of the weave and push the needle through and sewed around the drift wood sewing back into the tapestry every 1cm and knotted securely at the back.

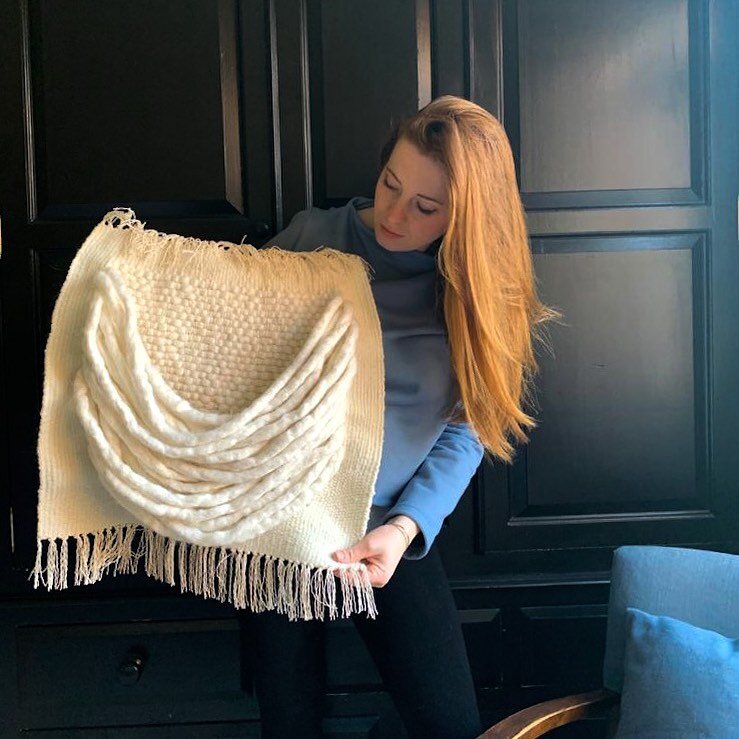
This little weave was made with some chunky Rya knots at the hem and then little triangles of plain weaving. And then hand stitched the dowelling to the tapestry so its ready for the wall!
Thats it your weave is complete!
There is lots of instruction in here and feel free to ignore most of it! The main principle is OVER/UNDER/OVER/UNDER and then let your Childs creativity take them wherever they wish to go!
Do tag me in any creations you make I love to see them!